Tuesday, September 25, 2012

A Sorbetto and our newly hatched ducklings.


 ~ Five hours old ~

Modelling a new Sorbetto top with the ultimate accessory - newly hatched ducklings!

I made this Sorbetto in a Size 4, which fitted much better than the previous which had been a little bigger. I made this using a Japanese Lawn cotton and trimmed the edges with complimentary bias binding.

I decided to keep the folded panel down the centre. Although next time I think I will branch out a little and try a few different styles (pleats, buttons, lace).


After what felt like months of talking and guessing, I was beginning to think these little lovelies would never hatch.

But they did today.

All 8 of them... and counting!

If you want to see more photos of the ducklings, visit my other blog Green Thumbs and Dirty Nails.


Sam xox

Monday, September 24, 2012

A trip to Feltfine.


Recently I paid a visit in person to the farm where Feltfine is based deep in the beautiful Hunter Valley. I invited a new blogging friend along to join me for the trip, as I knew she was an enthusiastic knitter and would love some of the Alpaca yarns Gary had for sale.

As we entered the farm we were greeted with these beautiful Alpaca's, we were soon to discover an Aladdin's Cave of woolly treasures. Given a washing basket each to utilise for collecting our goodies, my partner in knitting crime and I were left to browse what the shed had to offer us. We spent a leisurely hour handling the softest of fleeces, digging through tubs of yarn, and diving into bags of the most beautifully dyed fibres...

~ Only the beginning ~

~ Kristin shows us her range of coloured felt batts ~

~ Alpaca yarn made from the fleece of Gary's own Alpaca's. Complete with the animals name! Now who wouldn't want to knit up some cozy winter socks from "Mr B"s fleece! ~

~ Sample bags ~

~ An entire wall of dyed Merino fleece ~

~ Do we really have to leave? ~

As we drove away with our bags for goodies, it was agreed that the pilgrimage to Feltfine was definitely worth it! If you aren't able to visit in person, I would seriously recommend checking them out online - they post worldwide! It feels so good to be supporting a local 'home grown' business.

Sam xox

Wednesday, September 12, 2012

The first skein.

Today I wanted to briefly share with you a photo of the very first skein of wool I spun. The photo is grainy because at the time I didn't want to take 'nice' photos of my effort. I was embarrassed by how lumpy and uneven the yarn turned out to be. I was frustrated by my obviously novice ability and didn't think it was good enough.


Now I can see it really is beautiful. Handmade yarn does not need to look like it has been bought from a store. This skein has been made by imperfect hands on an imperfect timber wheel. It represents the beginning of my spinning journey. 

My starting block.

I've been told to keep the skein as a memento by some. Others have instructed me to knit something 'extra special' from it. For now it is hidden away at the bottom of my knitting basket, kept safe, and quietly reminding me that it doesn't hurt to be a beginner sometimes.

Sam xox

Tuesday, September 11, 2012

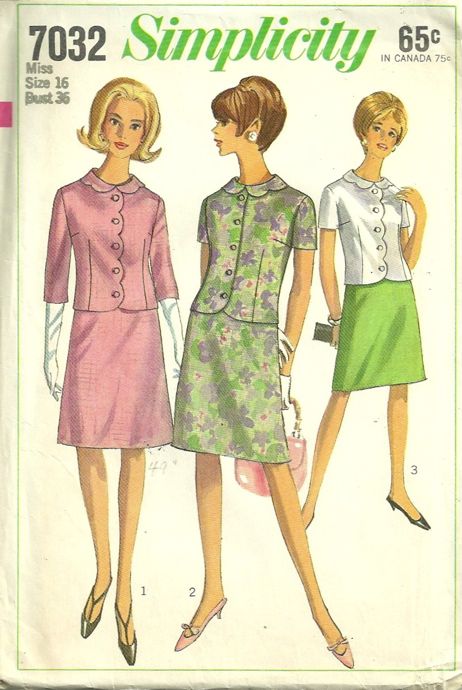
Simplicity 7032 progress.


I first decided to make this pattern in February 2011, can you believe that?! A year and a half ago? Talk about procrastination! The good news is that I am cruising along now and am getting close to finishing it.

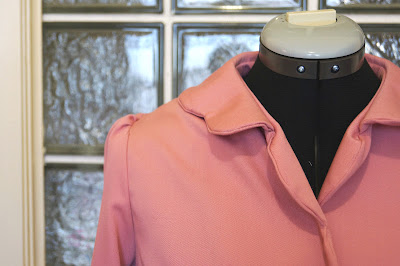
I want to share with you some photos of where I am currently up to. Please be kind, this is the first jacket I have ever made. I know some of the seams are a bit dodgy, and the scallops are not perfect. But I am learning quite a lot from making this two piece suit, so for that I am grateful. I think a pink two-piece suit is a necessity for any vintage wardrobe.   :-)

Here are some photos of where I am up to with the jacket...


 ~ The back of the jacket has not yet been pressed ~

 ~ The Liberty Betsy fabric I intend to line the jacket with ~

 ~ Elbow dart ~

The skirt has been cut out and is ready to be sewn up. I am going to make it with an invisible zip because I like the look of these, even though the pattern asks for a side zip.

So, my question to you all is what is your preferred garment underlining method? I would love to get some tips/recommendations before I decide on how to underline the jacket and skirt. Any advice would be very much appreciated!

Sam xox

Monday, September 10, 2012

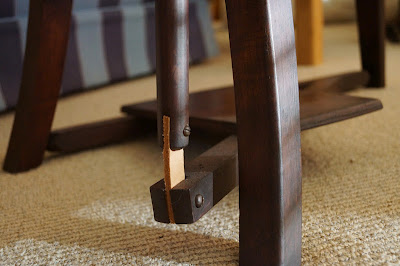
My spinning wheel.


When I began knitting back in January I had unexpected success. I used YouTube to teach me certain stitches, and then persevered hard until I got the hang of it. I was motivated by the idea that I would soon be able to create my own knitted clothing by hand, and not have to rely on all store bought winter garments. The thought of becoming self sufficient in not only sewing my own clothes but also knitting my own clothes appealed to me greatly. The world of wool opened up to me and I was learning the difference between Merino and Shetland wool, and appreciating blends containing alpaca and mohair.

The thought occurred to me in February that I could take this new found skill one step further, and try making my own yarns by learning how to spin wool. I was aiming high. I knew no one who spun, and better still had never actually seen or touched a spinning wheel. "How hard could it be?" I told myself. I bought my spinning wheel off eBay for $90, and a 1kg bag of Merino wool for $30. I received both in the post on same day, and spent the evening assembling the wheel and appreciating Jamie's assistance in adjusting the tension.

It took me over three weeks to 'get' how to spin. I watched countless YouTube videos, studied the spinners hands, fingers, movements, peddling. Trying to absorb every aspect of their spinning methods. What I learnt quickly was that spinning is very much a physically involved activity. The wheel powered by the foot/feet, the wool guided by the hands and fingers, and the eyes keeping watch over the tension. At first it sort of feels like the time when you were a kid, and your Kindergarten teacher the class "pat your head and rub your tummy" at the same time. And do you remember how you felt really uncoordinated? That was how I felt for at least three weeks. Then it all clicked into place. I now call myself a "Spinner", and I am knitting a scarf from my own hand spun wool.

I am super in love with my spinning wheel, and feel I have made another step towards self sufficiency.


For anyone who is interested, my wheel is an Ashford Kit Kraft and from my research I estimate it was made in the 1970's. If you are thinking of buying a wheel for yourself second hand, I would recommend buying a maintenance kit from Ashford (these can be found on eBay for around AUD$25) and are worth it, because you can replace your leather piece, hooks, strings, and give the wheel a bit of oil. The Ashford website also has an online book Learn to Spin. I don't mean to sound like I am 'pushing' Ashford products. There are many different spinning wheel suppliers out there. It just happened that I bought an Ashford and so far have been really pleased with their products.

Sam xox

Sunday, September 9, 2012

Butterick 6743 Apron

"You're the talk of the bridge club in these snappy aprons."


I finally have my sewing groove back! To kick things off here is an apron made from Butterick 6743. According to the Vintage Pattern Wiki, this pattern was sold in 1953. I bought my copy from Etsy last year in factory fold condition. It is hard to imagine how the pattern had not been used until for over 50 years as it's just too darn cute!

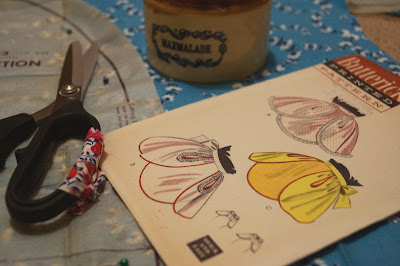
The pattern asks for one yard of fabric and five yards of bias binding. There are four pattern pieces: front section (cut 1), side section (cut 2), waist band (cut 1) and tie ends (cut 2). I selected a medium weight cotton fabric in a retro print that I thought would be perfect as a half apron. To set it off I paired it with a musky pink bias binding. I sewed up View C (original pattern photo at end of post) in only a couple of hours.


"Saucer patterns with novel loop holes."

The curved edges were finished with bias binding making finishing these seam a breeze. I sewed the waist band to the apron panels using a French seam, and double folded all the tie edges to give a nice neat look and to make the bands slightly sturdier. Here are a few shot of the underside of the apron.


Now I worry it is too cute to use! Can one wear an apron as a fashion accessory?

And finally, here is the original pattern in all its glory...


I have about a dozen sewing projects floating around my head at the moment. I have a few meters of Liberty Betsy and Mauverine just asking to become summer blouses. Then to top it off Gertie's book arrived and I am already tempted to make at least 5 projects from it too. This will be a busy Spring!

Sam xox